Showing posts with label Imperial Knights. Show all posts

Tuesday, 24 May 2016

3000pts game with my three imperial knights!

It will probably be the only time I get to stick down all three of these at once for along time and it was the first time I had all three painted to be able to so this was quite exciting. I may have got a bit 'pre battle' picture excited and then failed to take any more pictures as the game went on.
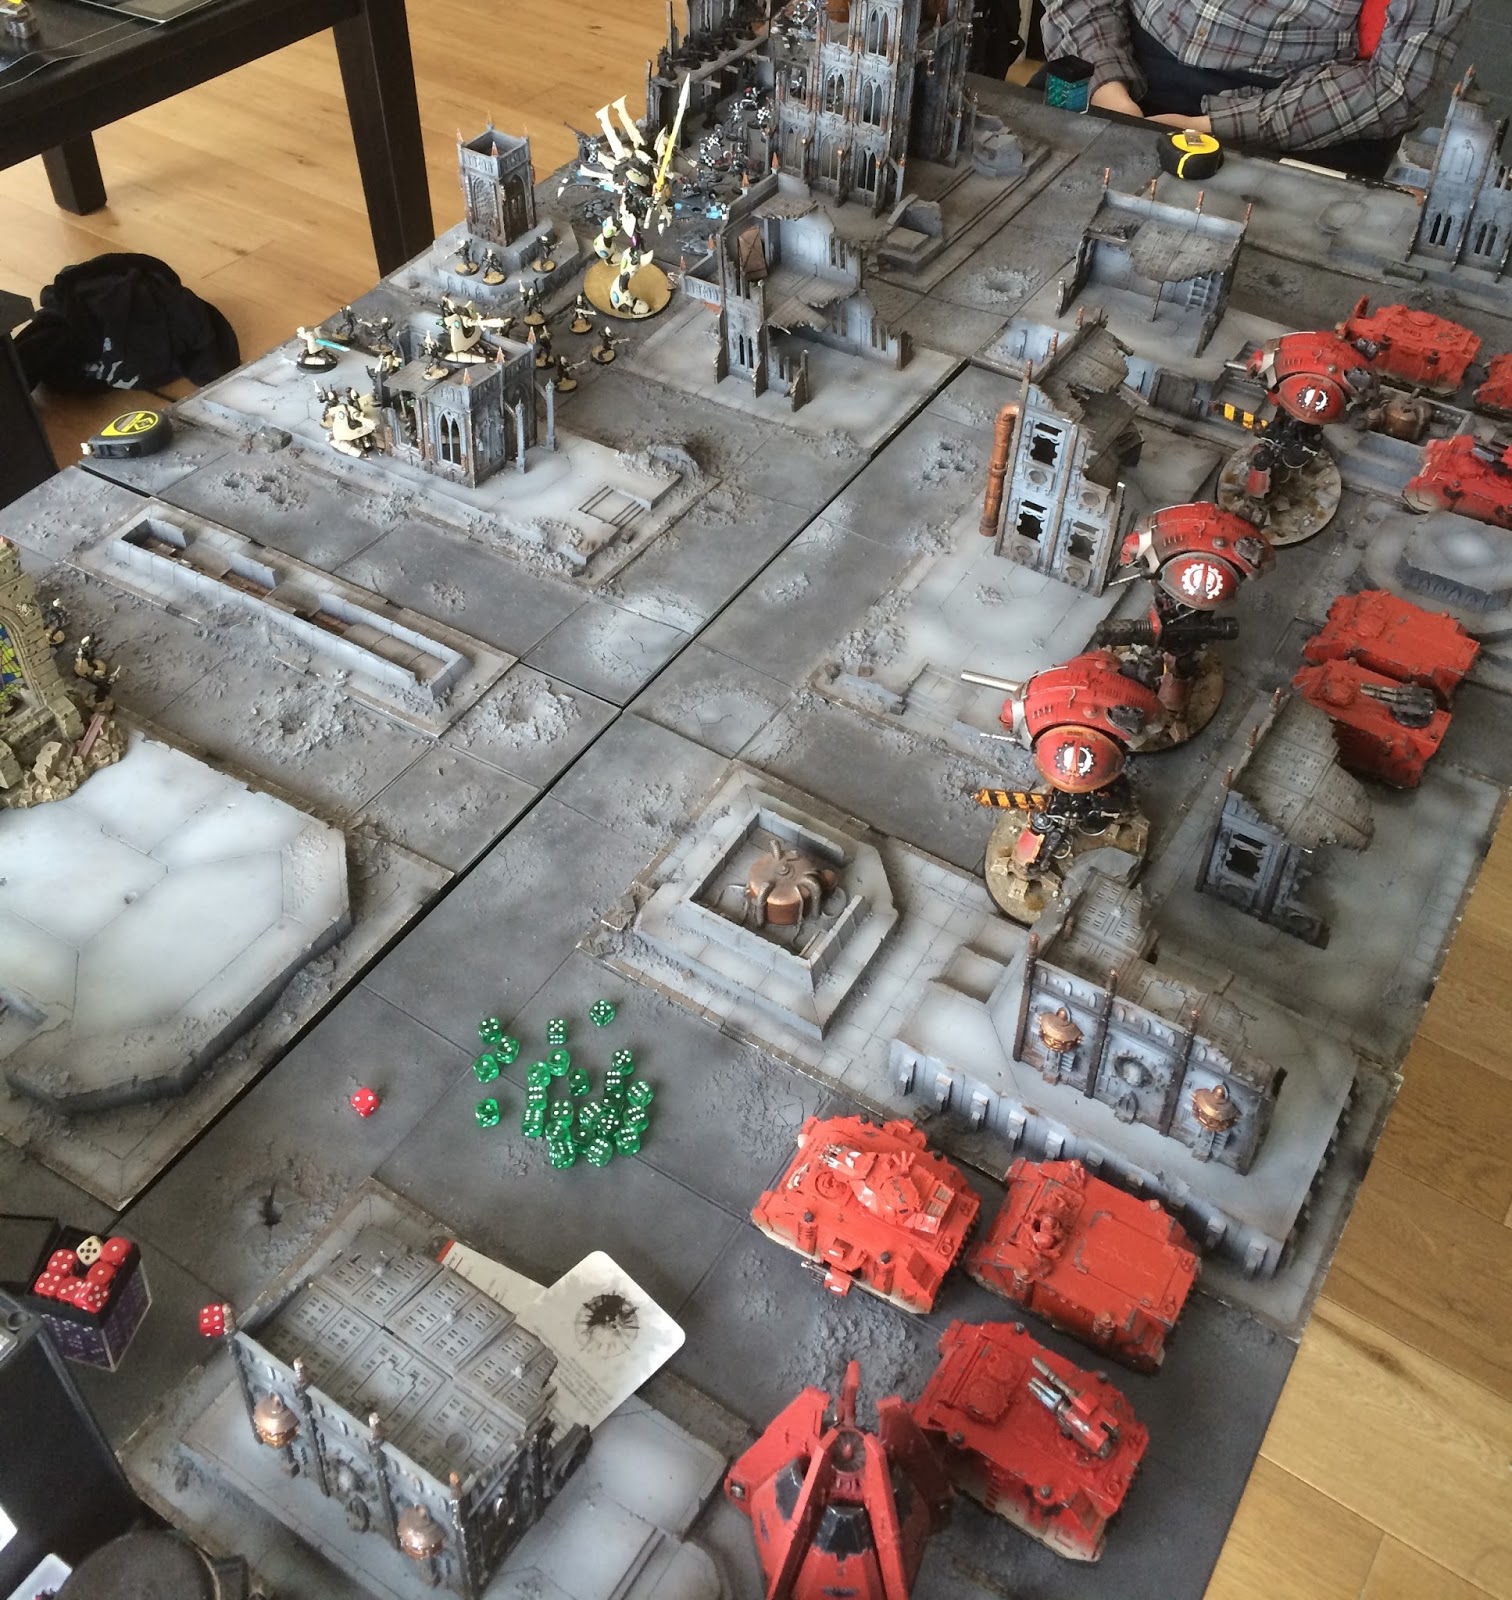
My opponents were two friends playing allied eldar and harlequins. They took a knight too, but a much better eldar one. That for some reason costs way less points. GW sort your rule books out for goodness sakes!


Their view.

My view.

Definitely better to be behind these guys.

The three big boys in formation.

Turn 1 saw me kill a viper and assorted harlequins, almost a whole guardian squad and glance a prism tank, limited somewhat by nightfighting. I lost my vindicator and a knight to a charging eldar knight.

My remaining knights charged the single eldar knight and one survived to remove it from play. (its worth mentioning if my opponent has split its attacks he'd have killed both, eldar knights are needlessly amazing.)
Then I forgot to take anymore photos... whoops. The eldar army spent the next few turns concentrating on removing my knight from play. I went for his prism tanks but left on a single hullpoint and cleaned up two squads of firedragons in vipers alongside the last guardians and a harlequin squad.
The game finished early on turn 5 with both sides on 9KP's, we had decided to use no other win conditions because sometimes its just fun to smash face. A well earned draw for everyone involved and great fun was had by all. Probably particularly me as I got to enjoy that freshly painted models on the table moment.

Tuesday, 17 May 2016

Imperial Knight 3, completed in just one post and four days!

I got a bit technical with this guy and painted the machinery parts first and based armour plates individually while trying to spray as if they were attached while thinking about light zenith. He's also magnetized so he can weapon swap and to help his body and legs hold together. I did the faceplate completely first because I just wasn't sure on it but its grown on me and now it might be my favourite. My affections are clearly fickle when it comes to faceplates. Next up was sponge weathering and brush painted scratching.


And finished the guy suddenly! Yeah so in my painting fervor I forgot to take more photos of my progress but I'm very happy with how he's turned out. I followed the same steps as with Knight #2 although he's configured more like Knight #1 armwise.


Based! I used the airbrush to get his feet and bottom of the legs and armour good and dirty. Rather than do something scenic and complicated like knight #2 I decided to do a much more simple but busy base using mainly elements from the basing set and some GS to give it a bit of depth. I seem to have put vast numbers of helmets onto the base so gave them a variety of legion colours to mix it up. Maybe I should do a FW one next... or just some warden's... tough choices.

Tuesday, 10 May 2016

Imperial Knight 2 part 5 Complete! Weapon and faceplate.

The other knightly faceplate here, I wanted them all to have different ones. I guess for number three I'll have to use the skull one I don't like or pick up a Knight Warden helmet... but then what will I use when I impulse buy three knight warden's?! I'm tempted/miffed by the new Knight renegade box set, it seems insane value!

Close up time! You can just about see his eye lenses, if you squint hard and use a torch..
I called this one Ares after the god of war. A short name for the scroll so I fancied up the letters to add some bulk! The 'S' looks a bit Dollar signy... ah well. ARE$ god of profitable war.

And with a gun, the housing is a bit curvy on the wrong side being designed for the other arm in classic GW shortsightedness before they did dakka ones and all the new gubbins. Still I'm very pleased to get this guy onto the finished shelf. Ooo I also gave him a coat of varnish to seal in the decals and help them blend into the model better and I used some tuft bits on the base, a great use for the needlessly massive ones army painter and GW insist on giving you so many of. I'm going to try and speed paint number three, painting the under armour and the armour plates seperately. Of course I might get distracted and just do something else... but that's the plan!


Tuesday, 3 May 2016

Imperial Knight 2 part 4 decals

Popped some decals on him, these are always a bit of a pain being so large and delicate, I find I need to do things like slice between all the eagles 'feathers' to ensure there is no warping over that massive shoulder pad. I also painted the mechanicum icon on his right knee and totally failed to get a close up... whoops. I used white as I lost one of my three transfer sheets to make my remaining one go a bit futher but actually really like the white/red contrast.

Again I slice around all the clear bits to help avoid warp and two slices in the skull around the middle of the forehead. They're not quite even at the bottom but it helped to even out the massive cog difference at the top!

Banner and knee cog.

Tuesday, 19 April 2016

Imperial Knight 2 part 3 weathering and details.

So here's pretty much where I'm at, closing on a year since I got this guy base coloured. Who says I never get around to things eh? I weathered the red with a sponge using the highlight orange (wild rider red) and dark brown(rhinox hide). Minor chipping in places with the brown and metal on a few sharper exposed edges. Brass scorpion with watered down nihilith oxide and silver trim were both toned down with agrax earthshade. You can see the legs are yet to be shaded and weathered here but I got round to it below!

The mighty chainblade, swapped to the other side on this chap to give some variation between the knights.

A closer look at some weathering.

Eyes ready to be very slightly visible under the faceplate later.

Leg weathering! Sorry about that crummy camera shadow...

Legs again!

And everything so far all together. Hopefully I'll keep up the paintng vibe on this guy and update sooner than a year away.

Monday, 15 June 2015

Apocalypse or first turn wins 40k

I used my knight! Vs a Khorne Lord of Skulls! I thought mine was over costed but that Khornate monster is something else.

Basically the game seemed largely to boil down to the fact my team mate seized the initiative and we killed the khorne lord so we were a third up in points. Entertaining game against a very good humored opponent. I wondered if anyone had any strategies to play these games without the 'roll for first turn and the win' feel? Forcing people to use 50% reserves or similar? Bit of a pain to need another table to layout those units and take the time to move them on in an already slow format.

The armies line up.

Lord of war standoff.

The blood angels thought the alpha legion were the ultramarines obviously...

Yes I'm quite good at turning the far future into a parking lot. Sorry.


Thursday, 30 April 2015

Imperial Knight number 2 progress WIP

On some level I believe I enjoy suffering. So I decided as I was getting lots of painting done I should start a lengthy project even though I'm in the middle of another one... Cunning as a fox me... Anyway here'es where I've got to:

The spray paint stage (his guns and face are also done but I forgot to snap them! First everything got a coat of black. then red on the armoured parts. trying to keep it off the underbody with limited success. Then brown over the base and feet. A little silver for the dred corpse. Grey for the rocky area.


I tidied up the black and used silver to pop in the details like with my previous knight. Other metal will be brass to keep things varied. Hope you like him so far!

Tuesday, 9 December 2014

Imperial Knight (Complete!) part 5 Cannon arm and helmet.

Painting is finished! I may go in and use some weathering powders at some point to add more colour to the shadows of this huge model and to tie it into the base more but for now I'm going to give him a little rest time and try and get in a game or two with the beastie. Having had the model knocking around for so long helmetless I actually didn't like it with it on at first but now I'm sold. I think some lights in the eye pieces would work very well for someone who likes doing that sort of thing as the shade means you can't really see inside the helm to the eye lights I painted.

For some reason my camera wanted to focus on his kneecap... might try again sometime!

And here he stands in all his glory. I've never painted anything this big before and it was quite a challenge. I've got another couple of Imperial Knight models to do and would like to buy some of the amazing forgeworld models somewhere down the line but due to the immense time they take having my own knight house isn't going to happen anytime too soon! I want to try and switch up the leg poses on my other two to be a bit more dynamic than this one and so that all three don't look identical! Sadly the kits legs are really lacking in posability which is a shame as the rest of the kit is fantastically mobile. The arms are also swappable so I'll be giving that a go too! Pictures of number two's pose to come! Thoughts and comments welcome. Particularly in regards to powder weathering I might do. I have most of the Forgeworld powders and can buy others. My basing scheme has been this pale earth colour but I'm tempted to go back and red them up for a mechanicum world as I'm very tempted to do a Mars/Industrial red planet board and it would be nice if my army actually fit on it! However... I felt this guy would look better with a pale sand colour rather than rust red dust... help me sort this one out please!

Tuesday, 2 December 2014

Imperial Knight part 4 Combat Weapon and head.

HAZARD STRIPES! I love them, I thought about doing them over the top of the main hull or on part of the shoulder pads but with their curved shapes felt this might be a bit ambitious and was so happy with the subtle shading my sprayed on base colours left that I didn't want to mess it up! I actually nearly gave up half way through and took a break before I could face carrying on another day.

Here the stripes have been blocked out and some shading has been done with bloodletter to tint the edges of the sword in orange and into the cracks between armour panels details as well as around rivets. (You can also see I've weathered the hull with chips and scratches as well as added more detail, as well as blacked the exhausts).

I weathered the weapon up using my chip and scratch methods over the flat areas and exposed edges respectively. I added seraphim sepia to the cracks and areas I felt would be in deeper shadow. I also painted the eyes and silvered the piping on the head as well as drybrushed over the head to bring out detail. Most of this will be obscured by the helmet face but its nice to be thorough!

Here's a close up of the other side of the sword arm. The stripes are not perfectly parallel OR of exactly equal size but I did do my best! The weathering helps to hide these imperfections and tie in the different stripe colours particularly where weathering crosses areas of different colours so I'm happy with the general effect. (You can also see some of the basing details, such as the skeletal remains of an emperor's children space marine behind the foot and the large slate piece who helps way down the base.) Thoughts and comments welcome!

Tuesday, 25 November 2014

Imperial Knight part 3 decals

Here's some more knight action! I finished off the base, by adding turf and weathered the legs. I added some of the impressive decals to my knight. I read the heresy mechanicus book recently and obviously love taranis, although I believe the heraldry was different in the heresy to on the sheet I just used the sheet ones... I like the idea of a knight with ties to the mechanicum and the imperium so my knight has both the cogged skull on his left shoulder and the aquila on his right. Another cog went on his left shin pad and the Taranis cog arrow and yellow portion went on the banner. This suited nicely as I love using yellow as a spot colour on my Blood angels and praetorian guard, and will do more yellow on this guy in the form of hazard stripes on the weapon, so will tie in with my other forces nicely. The shoulder pad decals are a little tricky to place without warping but by cutting between aquila wings and cog teeth it worked out alright! I also silvered the large area under the aquila and its counterpart on the rear,although it needs some weathering to break it up, as well as the exhaust pipes, which will be weathered black smokestains later.
Thoughts and comments welcome as ever!

Tuesday, 18 November 2014

Imperial Knight part 2 basing

Here's a quick one with the basing colours done for my knight. I used two layers of dry bone colours and washed black and sepia into different areas I felt would be in shadow and to vary the colour. I painted up the bits of forgeworld resin cut offs to try and give the effect of tank traps that had been savaged by war and the knights toe is smashing through one. I used the dry colours on the knights feet and some of the grey on the toe that's smashing through the concrete between the two bone layers to give a hint of the new dust without it looking too grey compared to the rest of the feet.


The aim was to get the large model to look more integrated with its base as particularly with such a big guy on a pretty flat base I didn't want him to look like he wasn't really there. Thoughts, comments and ideas welcome as always! (The random white blob is a dire avengers helmet plum, I later dry brushed some bone over it to dumb it down as it felt a bit strong!)

Monday, 10 November 2014

Imperial knight


Got a bit carried away when these came out and bought three to clog up my cupboard space with boxes... I finally got around to starting on one back in March.


Here's the chap from the front, based in citadel black spray and then zenith painted plates using army painter dragon red, angling from above for the shadows. I painted in trim with warlock bronze and base yellow. He's a bit brass chaos at the moment but a big block of silver under the Aquila should sort that out.


A top view with the all important scones. Next post will have more basing and tying the model into the base, alongside more leg detail.